Mt. Gulugod Baboy: Complete Itinerary and How-To-Guide

Gulugod Baboy
Mt. Gulugod Baboy
Are you going for a swim or a hike? This is a usual trade-off for climbers especially during the summer months. However, what if I tell you that there is a climbing destination that can satisfy your need to climb and can get you your beach tan at the same time?

Let me introduce you to Mt. Gulugod Baboy.

Quickfacts
Height? 525 MASL according to Pinoymountaineer.com
Trail Difficulty? 2/9
Jump-off? Philpan Resort, Anilao, Mabini, Batangas
Roped Segment? None
Guide? Not required but available at the JOP
Beginner friendly? 100% YES!

How to get to Mt. Manabu
1. Ride a bus going to Batangas City. Alight at Batangas Grand Terminal. 
2. From the grand terminal, ride a jeepney going to Mabini
3. Alight at the Mabini Junction. There, you will see a tricycle going to PhilPan Resort. Ride the trike and tell them you plan on hiking Mt. Gulugod Baboy. 

Tale of the Trail

After a 30 minute tricycle ride, we were dropped off at the JOP. It is just a waiting shed with tables on it. It was already lunch time so the place was empty aside from the people manning the registration.

Everyone who's planning to climb the mountain is required to register at the JOP. You can go up without a guide since the trail is well-established and straight forward. But for us, we chose to get a guide since we were not very comfortable with our orienteering skills. (HAHAHAHAHA!)

We were assigned a seven-year old girl as our guide! I was starting to feel regret for getting a guide when Pearl struck a conversation with Sarah (our little guide) so I realized that our guide fee will go a long way.

The initial part of the trek starts at the earthen stairs at the left side of the registration area. You'll climb it for about 5 - 10 minutes until you reach a concrete road. Turn right and walk straight ahead until you see an ascending trail at your left.

Gulugod Baboy

The ascending trail is the formal start of your climb to Mt. Gulugod Baboy. Going up is through a mini-forest so you'll be protected from the sun all through out. Take note that the trail of Gulugod Baboy is quite short, but a continuous ascent with very minimal flat area.

It was surprisingly tiring, given that many of the online sources explicitly says that this mountain is easy. (Thanks ha!! JK)  However, the wit and the childish stories of Sarah kept us entertained the entire time.

After an hour of walking through the forest, we finally reached an open area that will take us to the summit of Mt. Gulugod Baboy.

At this point, Sarah told us that she can no longer accompany us since she had to go home and their house is still a long way. In other circumstances, I may have argued that our fee is supposed to take us to the summit but since Sarah is just seven years old, we gave her the money and some of our snacks and bid her goodbye.

When you reach the grassland, it means that the summit is just less than 30 minutes away. We were quick in finding a suitable campsite when we reached this spot. Be wary of cow dung! It would really be a hassle if you mistakenly pitch your camp atop of this organic bomb.

summit gulugod baboy
The summit! Yey!
Since there are only two of us, we pitched our tent first before we assaulted the summit. We were a bit nervous that our things might get stolen so every minute we were throwing glances on our camp. 


summit assault
Assault to the summit
The trek up the summit was a breeze. We were both excited to see what was in store for us. At the summit, you'll have one of the best views of sunset ever. Feast your eyes on the beaches of Anilao, the Maricaban Strait and the distant Mindoro Island. Try to find the famous Sombrero Island if you're at the summit.
the restless soles
The blogger
The sun quickly set but fortunately we already pitched our tent earlier. Some of the other trekkers found it hard to pitch tent since the evening wind came with punishing strength that blew away anything not weighted down or pegged. We took our dinner and prepared to go to sleep. 


batangas


It was a good hike in Mt. Gulugod Baboy. However, when the night came, so are the other "elementals".  These people were (for lack of other term) a nuisance to all climbers that night. I am betting my money that these bunch are not mountaineers since they don't have any idea of proper mountain etiquette. 

They were pointing there strong flashlights on tents, talking, ehrrmm, shouting without any care to others, minding other people's business, and just being invasive. 

I was tempted many times to tell-off these people but Pearliloo kept on reminding me that they are probably drunk and I may end up beaten up by this people. It was a sleepless night,  trying to shut-off the shoutings and other noises emanating from their camp.

garbage
Garbage! oooh! Another garbage!
This was what greeted us in the morning! Garbage, and oooh, more garbage. There were lots of empty alcohol bottles strewn around the campsite but the people responsible were nowhere in sight. 

We picked up some of the garbages near our camp but unfortunately, we cannot carry more on our trash bag. I personally reported the incident to the person-in-charge that morning and he said that they'll burn the rubbish later. 

It was a bit disappointing that such behaviour is being brought to the mountains.

After a quick breakfast, we broke camp and proceeded on our descent. One thing we noticed was a tricycle driver offering a ride down of the mountain.

In order to go down the mountain, you'll have to backtrack to the same trail you used going up. It took us maybe an hour or so to reach the registration area. Remember to log-out at the registration area before anything else.

There are lots of private houses near PhilPan resort where you can use comfort rooms and shower. The fee for the use of the said facilities is 20 pesos per person.

We rode a trike back to the jeepney terminal. As we rolled faster and faster, we caught an amazing glimpse of the sparkling, blue sea of Anilao, Batangas. A place where the water kisses the blue sky.

A place with no past and future. Only present. 

-Adrian Villaflor, 2018 

My thoughts regarding the constructed concrete road leading to the summit of Mt. Gulugod Baboy

Many of Gulugod Baboy's visitors are not mountaineers but rather excursionists who ride their way up the mountain. I based this assumption on our experience since there are only one other group who we had shared the trail going up but the summit is very much crowded.

While it is satisfying to see kids, old people, couples and entire families enjoying the scenic beauty of Batangas from Mt. Gulugod Baboy (made possible by the concrete road), there are some trade-off that we have to consider.

1. More people, greater impact on the mountain. If left unregulated, it is not very long before the beauty of Gulugod Baboy is diminished.
2. Attracting "climbers" who are not really into nature. Since it is far easier to climb this mountain, people who don't have a heart for nature will see this as just another spot to loiter and vandalize. For mountaineers, a mountain is a sacred place.
3. Massive commercialisation on the mountain. This is an inevitable truth for some mountains aside from Gulugod Baboy. During our visit, there are lots of stores and peddlers on the mountain to accommodate the sudden influx of visitors and mountaineers. While earning a living is okay, there must be some regulations to it.

Things to Remember 
  1. Practice Leave No Trace Principle. Do not be one of the a***oles who come to the mountain to act like a caveman. Being civilized and disciplined is needed all the time. Okay? If you can't practice LNT, don't go near any nature spots. 
  2. If doing it commuters-style, remember to bring extra cash. The trike ride is a bit expensive, 200 pesos one way. 
  3. The mountain tends to be very crowded during the summer months especially during holidays and weekends. Consider moving your climb date during off-season or weekdays at least. 
So you've read yet another entry from us. Check out our other stories for more adventure. Always remember, life is made up of experiences, so have as many experiences as possible. 


Thank you from the Restless Soles!

Mt. Humarap: A Complete Travel Guide

summit of Mt. Humarap
At the summit of Mt. Humarap

Mt. Humarap: A Complete Travel Guide

Located 115 kilomoters south of Manila, Paete, Laguna is mostly known as the Carving Capital of the Philippines and is always overlooked as a destination for climbers and nature trippers.

But little did we know that this quaint town has an awesome destination that will be liked by travellers and mountaineers alike.

Mt. Humarap, or Tatlong Krus for the locals, features a scenic bird's eye view of the town of Paete, Laguna de Baie and the foothills of Rizal Province.

Fast Facts

Difficulty: 2/9, Minor Climb
Elevation: 310 MASL at the highest point
Trail Description: Concrete stairs, mini-forest
Starting and exit Point: Brgy. Ilaya, Norte, Paete, Laguna
Guide/s: None, not required
Rope Segments: None

How to get There

1. From Alabang, ride a bus going to Sta. Cruz. Travel time is around 2.5 - 3 hrs. 
2. Alight at Sta. Cruz terminal. From there, ride a jeepney going to Paete, Laguna. Travel time is around 40 mins to 1 hour. Tell the jeepney driver to drop you off at Paete.
3. Ride a tricycle going to the jump-off point of Mt. Humarap. Specifically tell the driver that you are planning on hiking Mt. Humarap since trike can also go on the top of the mountain. 
4. You'll be dropped off by a narrow street. Walk through it until you hit the dirt road leading upwards. That is the start of the hike. If unsure, do not hesitate to ask the locals.

Looking for your next adventure?


Are you ready for your next great adventure? Booking.com is the best website to reserve lodgings and accommodations for your next trip. And guess what? Booking.com also offers free cancellation giving you the flexibility like no other website is offering. Your next great adventure lies in your fingertips, so book now!
Booking.com

Tale of the Trail

We were behind our self-imposed itinerary since the commute from Alabang to Sta. Cruz, Laguna had been slow. It was already past 11:00 am when we arrived at our destination. 

The climb will commence the moment you step off the trike. From there, you will walk through a narrow street for 5 to 10 minutes. Initially, it will not feel like you're going on a nature trip since the street looks like any other streets in the Metro. We were telling each other jokes like "Tama ba tong pinuntahan naten?" or "May bundok ba talaga dito?" 

Just continue walking until you notice the houses becoming more sparse by the minute. The exact start of the trail is not really pronounced but then you'll see a concrete stairs leading upward. 

Mt. humarap
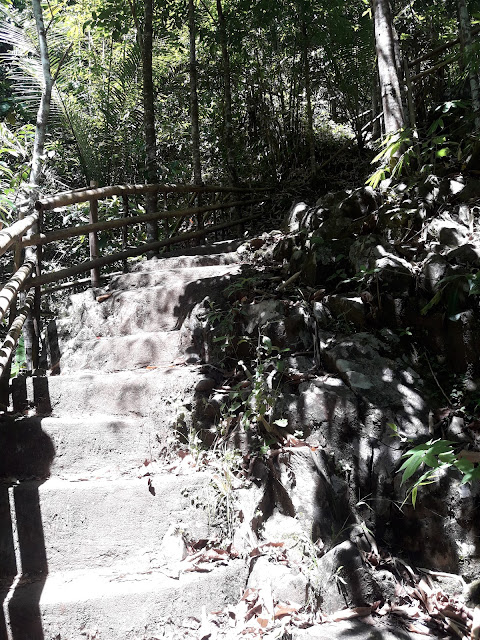
The concrete stairs leading to the summit of Mt. Humarap
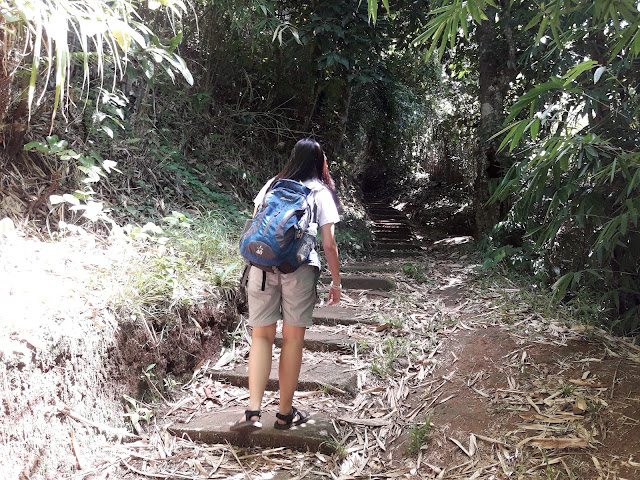
The concrete stairs are not particularly steep and have handrails for most part so falling down the sides is not really a problem. But you have to be careful from slipping since there are some sections that are covered by moss. 

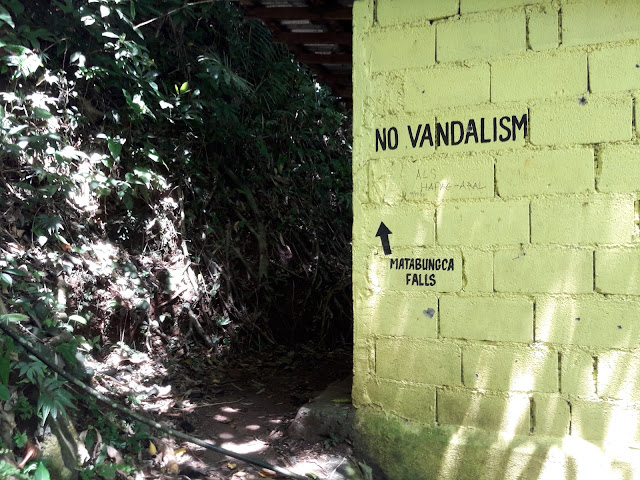
Half-way through the summit, you will pass by a comfort room, with a small sign that says "Matabungka Falls". If you want to proceed to the summit, continue walking on the concrete stairs, but if you want to visit the falls first, then by all means follow the sign. Matabungka Falls is just 10 minutes away from the comfort room. For us, we chose to visit the falls after summiting the mountain.

Matabungka Falls
At the junction, you will see this comfort room. If you follow the arrow, you will reach Matabungka Falls
The summit is less than 30 minutes away from this point. The stairs will even out just before the viewing point of Mt. Humarap. From this point, we were quite in a hurry since it was already noon time when we reached this point. 
Mt. Humarap
Few minutes into the summit
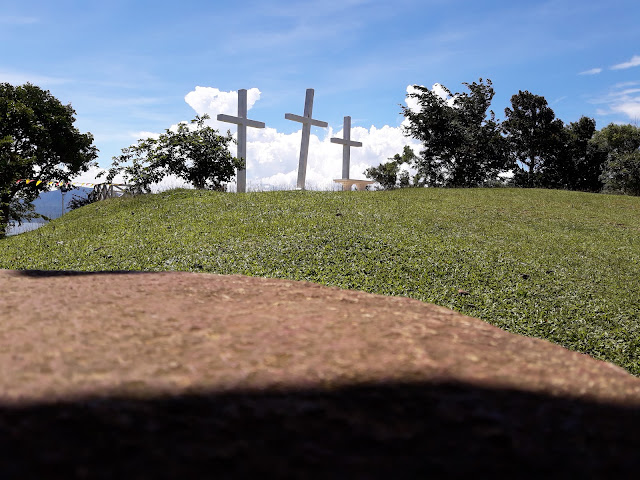
It was already mid-day when we finally reached the summit of Mt. Humarap. The summit is an airy and grassy hilltop best suited for picnics and family gatherings. There are only few other visitors in the summit, mostly people who used the road to reach the summit since we did not share the trail with other climbers. 

Summit of mt. humarap
Tatlomg Krus of Mt. Humarap
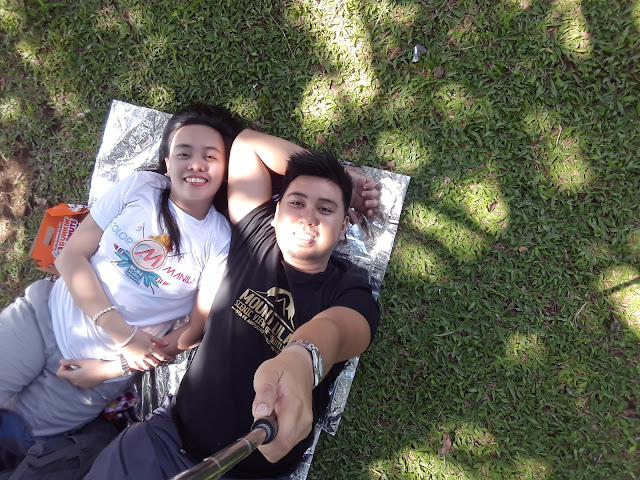
Certain facilities are available at the summit like comfort room, tables, and chairs since the location also caters for pilgrims during the Holy Week. Instead of renting a table and chairs, we decided to just use our picnic mat and just lie on the green grass under one of the many trees at the summit of Mt. Humarap. We ate lots of doughnut, as in lots of it during our stay here. 

the restless soles
The bloggers, Pearliloo and Iantot

mt. humarap

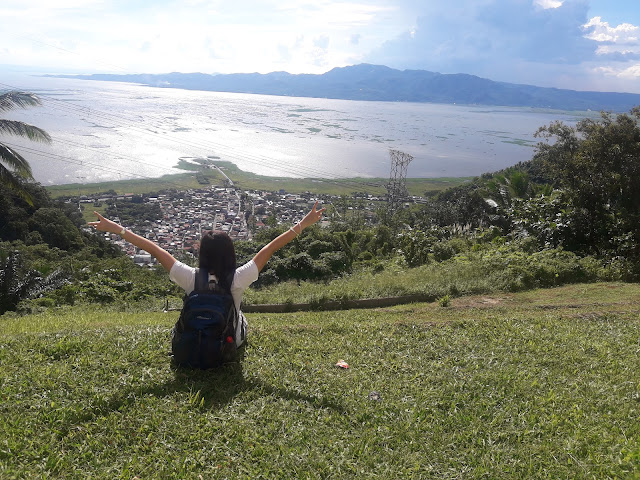
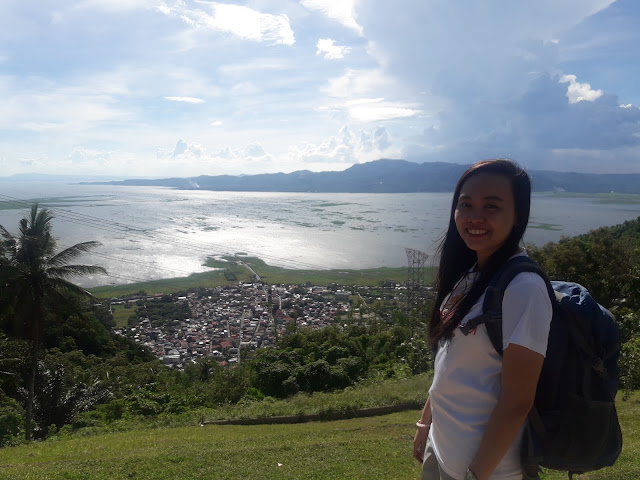
The view of the top made the short hike all the more worth while. From the summit, you can see the entirety of the town of Paete and the largest lake in the Philippines, Laguna de Baie. One thing I noticed was that the shape of Paete looks like an eagle with its wings spread out. Rizal Province is the land mass beyond the lake.
mt. humarap
Paete, Laguna de Baie and Mt. Sembrano at the background
If you look closely enough, you can make out the shape of Mt. Sembrano from the distance as well as the Pililia Windmills. It was like playing "I Spy", trying to locate all the familiar shapes and places in the distance. 

We relaxed and loitered for more than an hour in the summit before we head down once more to visit Matabungka Falls. From the summit, Matabungka Falls is just a 15-minute walk on the same trail. 

Matabungka Falls
Matabungka Falls
During our visit, the cascade of the falls were kinda weak since there has been no rains in the last few days. But it is still refreshing. One thing we really like on this destination is that, since it is not very popular, we had the entire Matabungka Falls to ourselves! 

NOTE: This is not always the case. Mt. Humarap is a pilgrimage site so it tends to be very crowded during the Holy Week and other religious festivities. 

We only stayed for thirty minutes in the falls because the sun is already setting. The falls is covered by thick canopy of trees so the place darkens even before the sun actually sets. 

You can use the comfort room at the junction of the trail to change your clothing. However, during our visit, the toilet bowls were clogged so you can just use it as a changing room.

The descent had been a breeze, and were back in the town of Paete in less than thirty minutes. You can stroll in the quaint town of Paete, Laguna like we did. We saw a great deal of the culture of the town by visiting different stores and sculpting studio.

Support Filipino artists by purchasing local products! We bought small trinkets like ref magnets as a souvenir of our trip.

From the town center, ride a jeepney going back to Sta. Cruz. Tell the driver to drop you off at the bus station going back to Manila. Fare is around 25 PHP.

Mt. humarap
Mt .Humarap
It is not the altitude of the climb that matters, but rather your attitude towards the climb. It was an easy trek, but it was worth the effort. All goodbyes are temporary. We looked back and we know that we'll be back someday. Someday. 

- Adrian Villaflor, 2018


Things to Consider


1. As always, practice LNT. This is the first and foremost if ever you are going on a nature trip. 
2. No guides are required since this is an easy trek. However, never underestimate it. A climb is a climb, so practice proper climbing behaviour. 
3. If coming and going back from Manila, be reminded that you'll have to pass by Calamba, Laguna and Sto. Tomas, Batangas. Both have large volume of traffic so expect road congestion during peak times, 7am - 9am and 5pm - 8pm. 
4. We were not able to ask the caretaker if overnight camping is allowed on the summit. Maybe on your visit, you can ask around and let us know. 

Thank you for reading our story / travel guide. I hope you were able to get something out of it. Please like and subscribe to our facebook page. We would very much love to hear from you. Aja!

Purgatory-Mangisi Traverse

Purgatory-Mangisi Traverse: Hiking Tips

blogger atop mt. purgatory

Everything in Life is risky. So we might as well take a risk doing the things that make us feel alive. Life is not meant to be spent indoors where you are safe and tuck all the time but rather, living means taking chances, conquering fears and collecting experiences.

Background

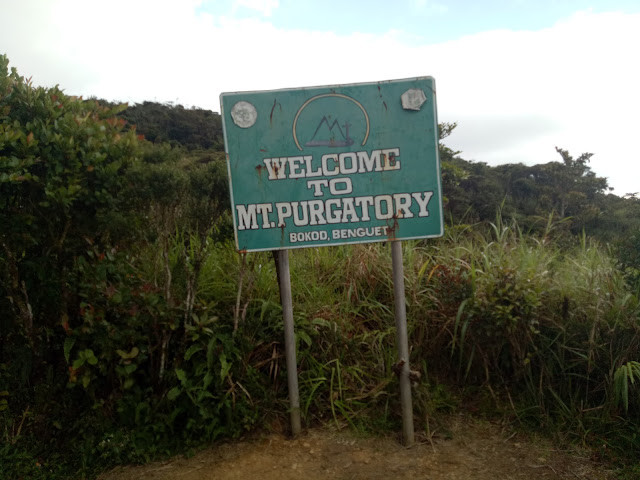
Purgatory-Mangisi Traverse is a series of mountains namely Mt. Pack, Mt. Kokompol, Mt. Mangakew, Mt. Tangbaw, Mt. Bakian, and Mt. Purgatory. 

This hiking destination features primeval mossy and pine forest, mountain communities and even a sea of clouds making Purgatory - Mangisi Traverse a must try for any would-be mountaineers. 

Mt. Purgatory got its unique, but a bit notorious name from two American soldiers who used to man an observation post in one of its many peaks. The soldiers described that the mountain is too cold as if they really were in Purgatory. The remark stuck thus the name of the mountain. 

The Team

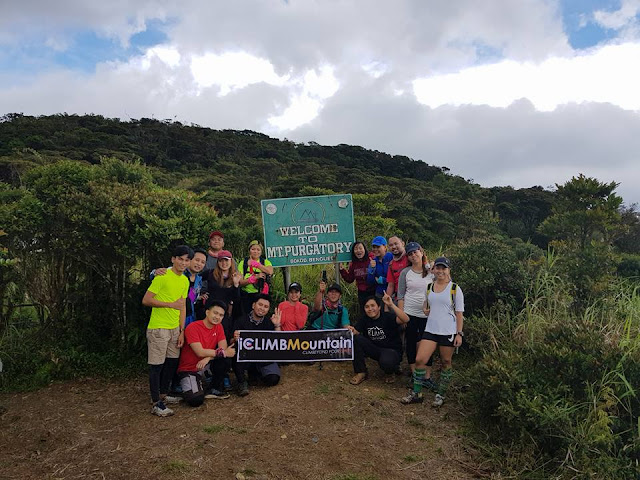
The climb was organized by Team iClimb, headed by one of the finest organizers I've met,  Sir Alfred Asan III. The climb date was June 2 - 3 2018.

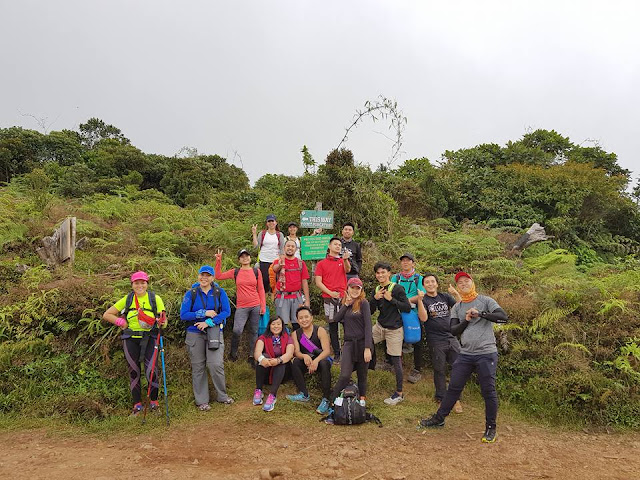
iClimb at Mt. Purgatory
Team iClimb headed by Sir Alfred Asan III

Fast Facts

Difficulty: 6/9, Major Climb
Elevation: 2329 MASL at the highest point
Trail Description: Mossy Forest, Mountain communities
Starting Point: Brgy. Japas, Bokod, Benguet
Ending Point: Brgy. Ekip, Bokod, Benguet
Guide/s: Required
Rope Segments: None

Tale of the Trail

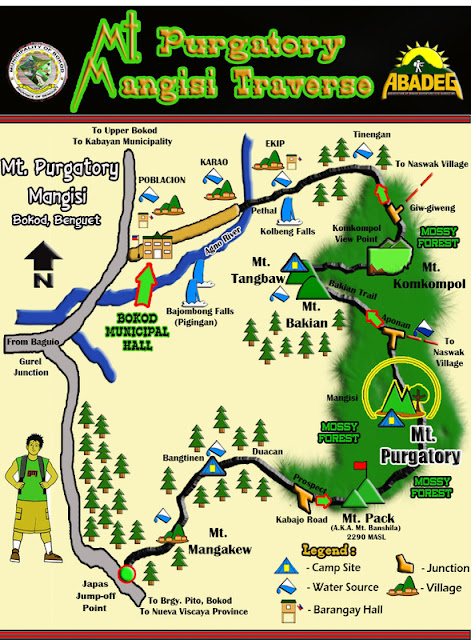
The entire trail can be divided into three segments based from the characteristics of its surrounding. The initial part of the trail is through mountain communities, the second part cuts through a mossy forest and the third, from the last mountain to the exit point is through a pine forest. 

After a seven-hour ride from Manila, we had finally arrived at the JOP at Brgy. Japas in Bokod, Benguet. After stretching a bit, we started walking towards the registration area where we'd met the Local Tourism and DENR officers. The territory where Mt. Purgatory is situated is part of the Ancestral Domains of multiple ethnic groups of Cordillera and also a protected landscape by the DENR. Such as this, all would-be climbers of Purgatory-Mangisi are required to participate in an orientation seminar. 

The orientation seminar will last for about thirty minutes. Try to maximise your time in the registration area. Listen intently to familiarize yourself not only to the description of the trail but also to gain insights about the culture and way of life of the people.

Two guides were assigned for our group. 

Purgatory-mangisi traverse Map
Purgatory-Mangisi Traverse Map


mt. purgatory

First Segment

From the registration area, we went back to the road and had a short prayer of thanks and blessing before hitting the trail. 

The initial trail was through a forest and mountain communities. The trail was a gradual ascent with thick forest cover so you are protected from the punishing sun rays. It will take you about an hour or less, depending on your pace to reach the first of the many mountains in Purgatory Mangisi Traverse, Mt. Mangakew


Mt. Mangakew has a mountain community on top, so people still have access to electricity and running water. We took this chance to refill our water bottles and use their facilities since you'll be more or less cut-off from the usual comforts of home beyond this point. 

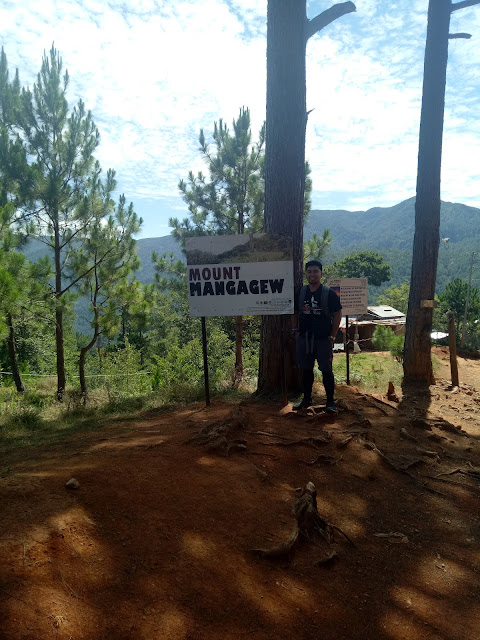
Mt. Mangakew at Purgatory
Mt. Mangagew, the first mountain of Purgatory-Mangisi Traverse
From Mt. Mangakew, it will take you another an hour or two to reach Mt. Pack. Going there is a bit more challenging since you will have to leave the forest cover on the first part. The trail from Mt. Mangakew to Mt. Pack will start off descending, so everyone knows that the next part will be an unforgiving ascend. 

The top of this mountain has lots of foliage so the view is not really on the actual summit but a few meters away from it. Just make sure to be careful in your wanderings since deep ravine may be concealed by the flora. At this point of our climb, we can feel the sudden drop in the temperature as the clouds slowly descended on us. 

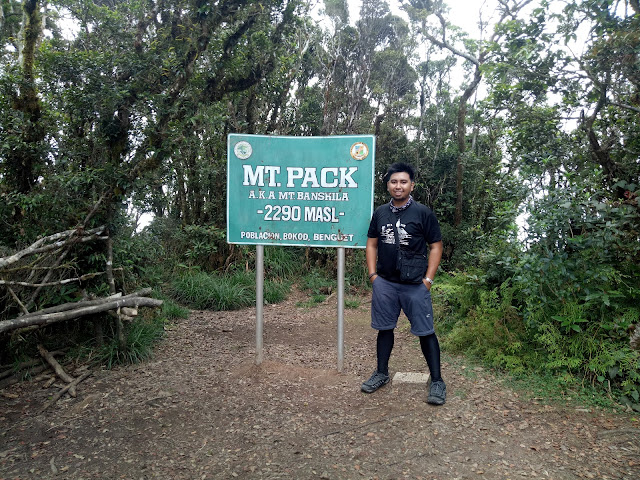
Mt. Pack
Blogger at Mt. Pack
We stayed atop Mt. Pack for only 30 minutes before deciding to proceed to probably the most arduous part of our Purgatory-Mangisi Traverse, the mossy forest trail to Mt. Purgatory. 

Second Segment

The sky darkened, threatening to give us a shower. So from Mt. Pack, we decided to hit the trail again despite the fact that we were there for only few minutes. We were kinda wearied that the trail will be infinitely more difficult if the sky decided to let us have it while we're inside the mossy forest. 

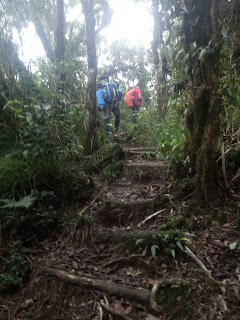
The mossy forest trail looks like a landscape from a mystical stories in fairy tales. Feast your eyes on the wonderful flora inside the forest. The trail will take about 3 hours before you reach Mt. Purgatory. Changes in elevation inside the Mossy Forest is minimal. However, the challenge we'd encounter was the low lying branches and leaves that may scratch or entangle you as you navigate thru this almost-mystical place. At first, we are much engrossed with the primeval beauty of the mossy forest, but after hours of walking inside it, you'll want to get out of there fast.

The Mossy Forest

A Bit of Supernatural

Halfway thru our hike within the mossy forest, I was looking at the ground for a minute when someone shoved me and run ahead. I looked up and realized that one of our members ran ahead as if running away from something. When asked, she answered that while walking, she saw a small, dark figure watching her by the side of the trail. She was creeped the hell out so she ran ahead. 

It was a hell of a motivating factor as we quickened our pace upon hearing her story. 

Mt. Purgatory
Mt. Purgatory, yey!

After three and a half hours of walking inside the mossy forest, we finally reached Mt. Purgatory. There's a general sigh of relief as we are finally out of the labyrinth-like forest. 

We had a few minutes of rest and picture taking at Mt. Purgatory. We took an extended break to recuperate from the long walk.  I personally asked Mr. Alfred Asan if there will be more mossy forest ahead. When he answered no, I felt so relieved. Whew!

Mt. Purgatory
The team at Mt. Purgatory

From Mt. Purgatory, our next stop was Bakian Village followed by Tangbaw, where our homestay was located. The trail going to Bakian Village has a very different vibe to that of the previous trail. The ground is covered by pine needles, and from it, you can see more of the sceneries of Cordillera. 

Dips and assaults are in the minimum from here on forward so I personally enjoyed this part. It will take you about an hour and a half before you reach Bakian Village. We breezed through Bakian Village since the night was fast approaching and everyone was more eager to reach the homestay than have another sidetrip (including me).
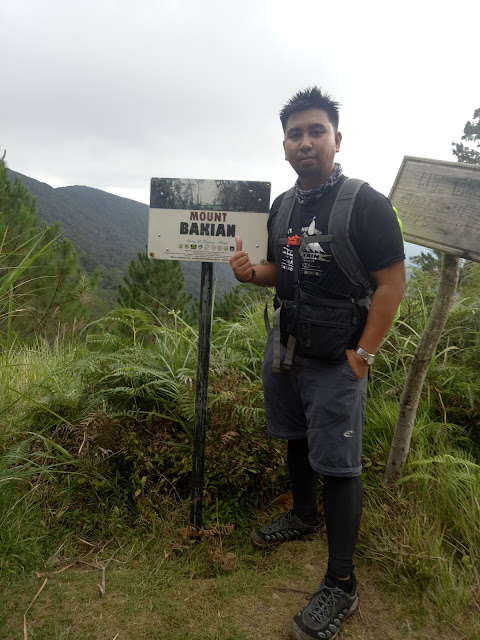
Mt. Bakian

Tangbaw is just a stones throw away from Bakian Village. It took us only 15 or so minutes before we reached the quaint village of Mt. Tangbaw. Sir Alfred quickly put in the work for our dinner. By nightfall, we finally got the chance to fill our stomach with something substantial, sinigang with rice. 

After dinner, we had a bit of socials before I dozed off to dreamland. 

Second Day

I was the first one (or so I thought) to woke up the next day. The temperature was refreshingly cold. I was quick to explore the village and its vicinity, walking up and down the slope near our homestay and just appreciating this piece of paradise. When I came back, everyone was up and preparing themselves for the last mountain in our itinerary, Mt. Kokompol. 

A handful of our members decided to stay in the homestay to rest since our itinerary changed a bit. Instead of doing the entire traverse, we will climb Mt. Kokompol then backtrack to homestay to pick up our things before proceeding to the exit point from Tangbaw . We did not proceed with the usual itinerary since a landslide made the trail from Mt. Kokompol to exit point more perilous. 

Mt. Tangbaw, mt. purgatory
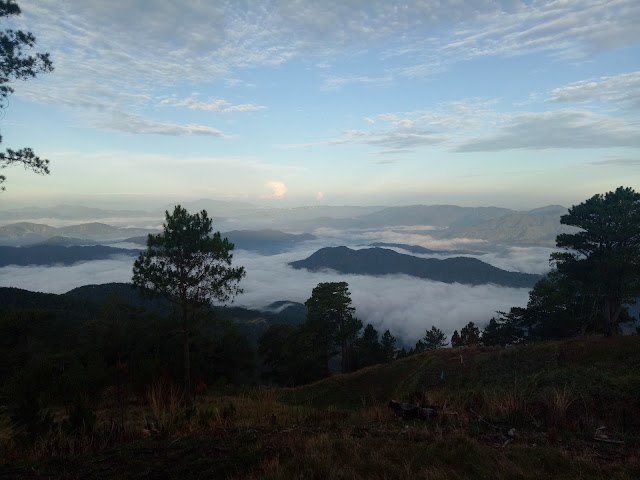
Sea of Clouds as seen from Tangbaw Viewpoint

From Tangbaw Campsite, it will take you 50 minutes to reach Mt. Kokompol. The trail is scenic with gradual ascents. Fifteen minutes before the summit, you will enter a forest where the trail increase in steepness. 

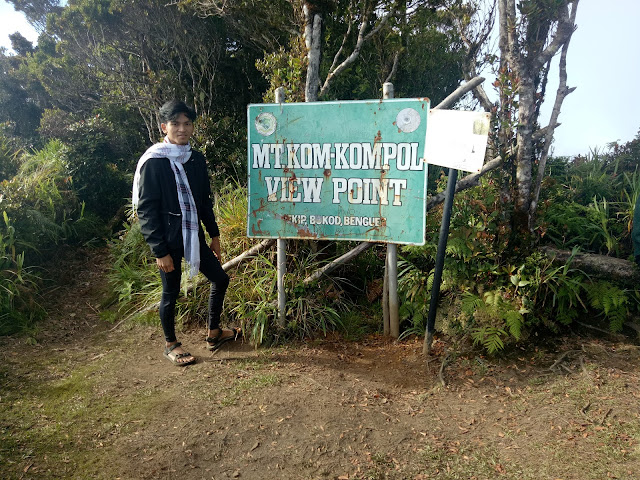
We were bit in a hurry since other groups are also aiming to summit Mt. Kokompol the same time as we. We were able to be the second team to reach the summit (yey for us!)

The view on Mt. Kokompol is just amazing. It is not an understatement to say that this place is where dream and reality meets. I was quite surprise to see a sea of clouds since there are only few literatures mentioning the sea of clouds in Purgatory-Mangisi. Watch as the sun slowly disperse the low clouds, showing the Cordillera mountain range with all its glory.
Mt. Kokompol Mt purgatory
Sir Rommel at Kokompol Marker
Sir Al, with the sea of clouds as his background
After having our fill of awesomeness of the view, we went back to our homestay in a much quicker pace. After collecting our things and tidying up the place, we bid our farewell to our good host.

Third Segment

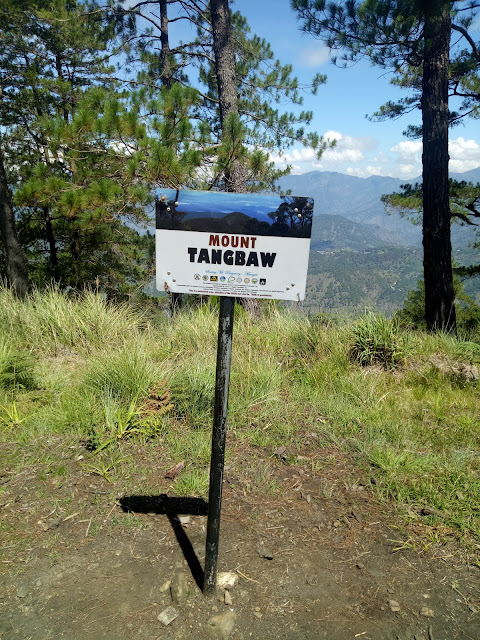
The descent from Tangbaw to Pethal is pretty straight forward. You'll have to walk for a few minutes through the community before you reach a wide trail leading down. Before taking the trail leading down, you can walk straight first to visit the Mt. Tangbaw Marker. It is just a 5 minute or so walk, then just backtrack.

mt. tangbaw mt purgatory

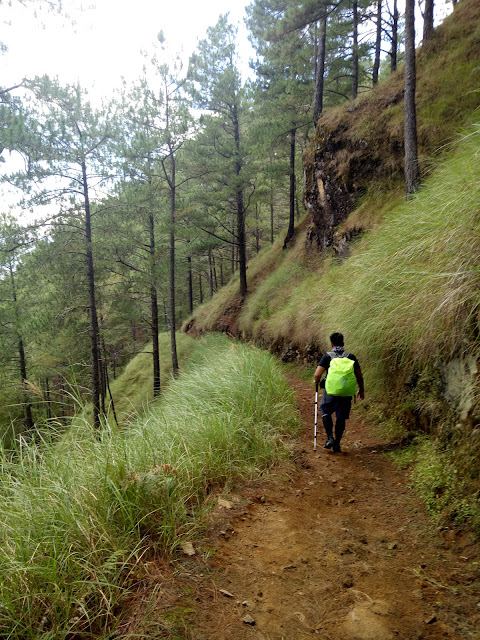
This segment is probably the easiest in the entire climb. It will take you about 3 hours to reach the jeepney pick-up point and ascents are very minimal. The first hour will be composed of walking under the canopy of pine trees and wide trail as seen on the photo below. 
Mt. Piurgatory trail
The trail leading down the mountain
After an hour, you'll see a sari-sari store where you can rest for a while. From this point, the trail will cut through mountain communities, meaning you'll have to walk on cemented trails which I very much believe to be brutal on your knees. This community walk will last for about an hour also.

Mt. purgatory
The sari-sari store
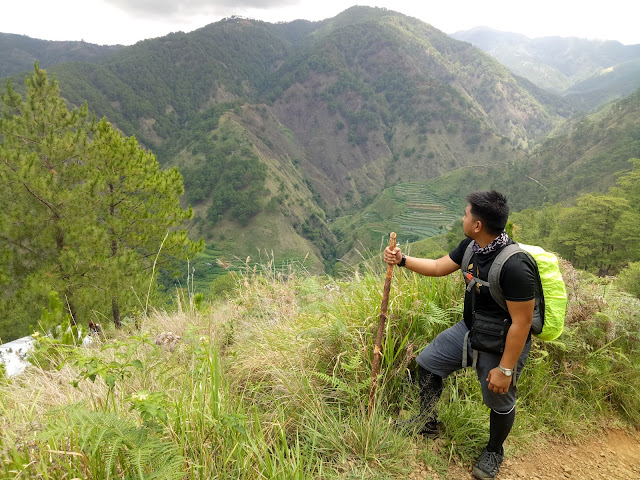
Then yet another hour, you'll be pretty much be in the middle of nowhere again. There will be some ascents but do not worry since you are nearing the conclusion of your climb. I'm not very fond of bringing my own trekking pole, so when the trail started getting steeper, I created my own expedient staff made of a tree branch.

Mt. Purgatory
The Basura Man of Mt. Purgatory
The view on this part was simply spectacular. You can see the glorious Cordillera Mountains, as well as the seemingly endless rice terraces. There are some portions in this trail that the soil is loose so proceed with caution.

After three hours of walking, we finally reached the jeepney pickup point. We took lunch here while waiting for our ride to arrive. After an hour of waiting, the monster jeep finally arrived. 

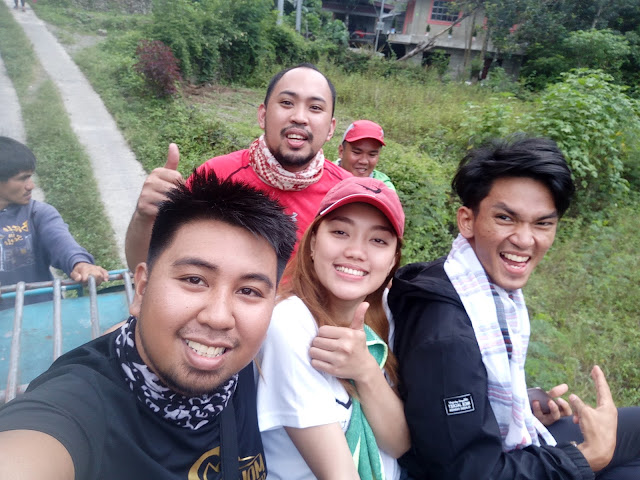
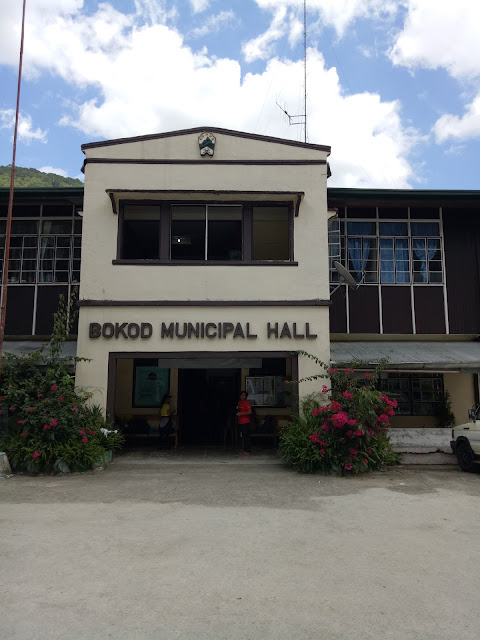
The jeep will then take us to the Bokod Municipal Hall where our van going back to Manila is waiting. Some of us rode at the top load just for the kicks, this is a bit of a bumpy ride so remember to hold-on to your seats. You'll pass by tobacco plantations and more of the mountain communities on your ride back to Municipal Hall. 

Mt. Purgatory
The ride down to Bokod Municipal Hall
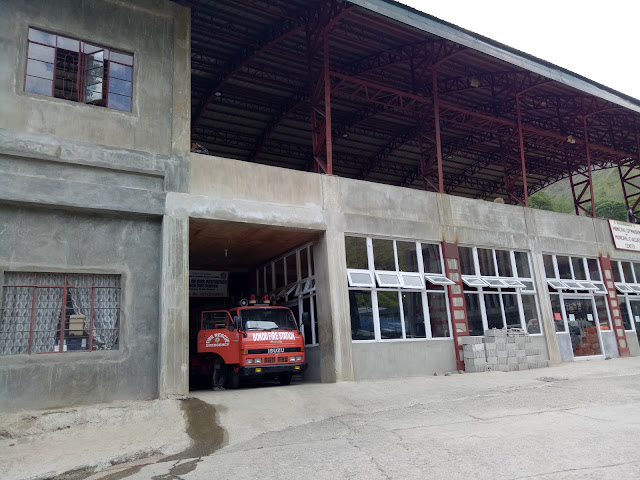
This ride will only take about 15 to 20 minutes. Use of  comfort rooms and shower rooms are available for only 20 pesos per head. Me and some of the boys used the shower rooms in one of the private schools near the Municipal Hall. After 48 hours, I can finally peel myself off of my sweaty clothes (hahaha!). It was damn refreshing. 

Bokod Benguet

Bokod Benguet

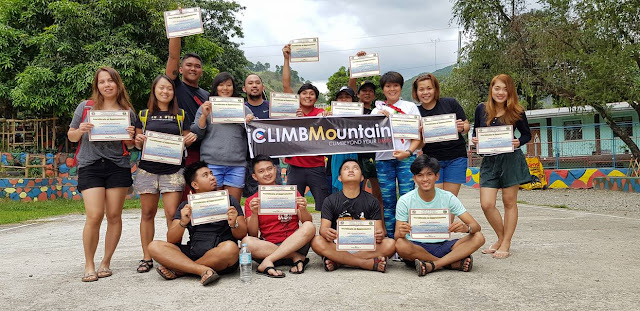
Team ICLimb
Team IClimb
It was tiring, punishing to the body and mind (my left knee hurts like hell during the entire descent) but it was worth it. What made it more worth it is the quality of people whom you climb with. Special thanks to iClimb Mountain and its organizer Sir Alfred Asan III. 

After our "certificate shot", we finally boarded the van. As the wheels of the van slowly pick up speed, and the mountains slowly fades away in the distance, a sublime feeling came over me. I just survived another mountain. A pang of sadness, as I know I'll be leaving another small portion of my heart to this place. 

Thank you Lord, Thank you for this gift of Life and Nature.

- Adrian Villaflor, 2018

Things to Consider


1. If there's one thing I'll never get tired of reminding people is to always practice Leave No Trail Principle. If you find yourself unwilling or incapable of following this sacred mantra, then mountaineering or any other nature activity is not for you. 
2. Prepare yourself. Personally, I found Purgatory-Mangisi a bit easier than the other mountains I had climb. Probably because of experience and so many other things. But always put into mind that anything is difficult for an unprepared person. 
3. Check the weather before climbing. It is imperative to always check the weather condition especially if you're going to a mountain in Cordillera. Heavy rains may result to landslides that may leave you stranded or worse. 
4. Be mindful of your actions and words, especially towards the indigenous people (IP). Remember that all the locals you'll be interacting with will be an IP.

Want to be updated on all your favorite blogs? 

Feedspot is the best platform for you to read all your favorite sites in one place. Just create an account and enjoy countless of content from your fave bloggers.

Check out this link to read the Top 25 Philippine Travel Blogs


Manalmon-Gola: Complete Itinerary and a How to Guide

Manalmon-Gola: Complete Itinerary and a How to Guide

Mt. manalmon and Mt. Gola
Mt. Manalmon (Right) and Mt. Gola (left)
A hiking destination in the heart of Biak na Bato Natural Park, Mt. Manalmon and its twin Mt. Gola is a go-to destination for every adventurers out there. It boasts numerous activities like hiking, swimming, spelunking, and rafting. Mt. Manalmon and Mt. Gola is definitely a must for any thrill seekers out there.

Aside from being a hiking and outdoor destination, it is also a good place to acquaint one's self to history and folklores. Mt. Manalmon is a silent witness to some of the most important events in Philippine History as well as few mystical stories to keep you entertained or creeped out for the entire duration of your hike.

Quickfacts

Height? 196 MASL according to Pinoymountaineer.com
Trail Difficulty? 2/9
Jump-off? Brgy. Bayukbok, San Miguel, Bulacan
Roped Segment? None
Guide? Required. Available at the JOP
Beginner friendly? 100% YES!

The Team

Mt. Manalmon and Mt. Gola are one of the earliest treks of Team Restless Soles. Same as always, there were only two of us in the team. Pearliloo and Iantot. Date of the climb was May 13-14, 2017.

the blogger at Mt. Manalmon
The Restless Soles

How to get there

1. Go to Cubao. Look for Baliuag Bus Lines. It is just across Victory Liner, near the footbridge. 
2. Ride a bus going to Cabanatuan, and tell the driver to drop you off at San Miguel, Bulacan.  Fare is around 150 pesos each. Travel time is 2 - 3 hours, depending on the traffic situation. 
3. Alight at San Miguel, Bulacan. Ride a tricycle at the trike terminal going to Sitio Madlum. Fare is around 200 pesos. Travel time is 30 - 40 minutes. 

Things to Consider before Visiting Mt. Manalmon

Mt. Manalmon and Mt. Gola are both situated within a protected landscape - The Biak na Bato Reserves. The LGU is regulating the number of people entering the protected reserves by requiring an advance reservation for anyone who wants to climb either or both mountains. 

To make your advance reservation, text or call Tata Carling at this number, 09195746470 or send them an email at rrboyflorencio@yahoo.com. To be sure, send a text and an email. 

Tale of the Trail

The excitement starts even before the hike itself. The initial part of the road leading to Sitio Madlum cuts through residential area. But few minutes into the ride, the cemented road ended and we were bouncing up and down as the rugged tricycle navigated the rough road that will take us to our destination. 

You will notice the drastic change of environment as you continue with your travel.  No electrical post and sparsely populated, you'll realize that you already left "civilization" behind. 

There will be one or two "toll gates" (I don't remember, sorry) along the way which you have to pay 20 pesos each. The money collected is used in the local community development fund according to the people we had talked to. 

After 40 minutes of butt-numbing tricycle ride, you will be greeted by a bridge made of wooden beam. 

Crossing the hanging bridge of Mt. Manalmon
Crossing the hanging bridge to Mt. Manalmon

The hike will commence at the wooden bridge. Upon crossing it, you will pass by the house / store of Tata Carling. Your advance reservation will be validated by leafing thru the printed permission letters. 

Good thing about this is that the staff of Biak na Bato will be the one to print your permission letters with information lifted from the email you sent, so make sure to include the necessary info when you contact them. Yey!

A small hitch occurred when Tata Carling cannot find our permission letters from the pile. But instead of sending us back, he decided to let us continue since we came all the way from Cavite. 

We were assigned a guide, Kuya Robert, for our climb. Kuya Robert is a serious but very helpful and awesomely knowledgeable of both the history and folklores surrounding the two mountains. 


Madlum River
Yehey! We're halfway to the summit!
A mandatory orientation was given to us as part of the protocol of the nature reserve. After the briefing, we started our hike. 

The first part of the trail is a walk through a forest. The trail is shaded so you don't have worry about sunburn. The ground was a bit rocky and sandy, like walking along a river bank. This part of the trail will continue on for about 15 - 20 minutes until you reach the Madlum River. You will cross this river, so make sure you have the proper footwear. 
madlum river
Kuya Robert for Scale!

The water was shallow, with the deepest part of the crossing only reaching our knees. But according to our guide, this river becomes a raging torrent during the rainy season. 

We rested for a few minutes and had a bit Kodakan (photoshoot) with Mt. Manalmon and Mt. Gola at the backdrop. According to the legend, a Filipino supernatural hero named Bernardo Carpio was imprisoned between two large rocks. These rocks were splitted when Bernardo escaped, thus the creation of the two mountains. 

After our extended rest (hahaha!), we continued on to Mt. Manalmon since this mountain is more suitable for camping than Mt. Gola. From the river, you will have to walk for about 10 minutes before you reach the actual foot of Mt. Manalmon. 


Manalmon Marker
Welcome to Mt. Manalmon
There are two trails leading to the summit of Mt. Manalmon - the difficult, and the easy trail. Well you know how it is. Why make life more difficult? So we chose the easy trial. 

From the marker, the angle of the trail becomes steeper with every step. The trail was rocky and solid but shaded nonetheless. 

A little more before the summit, Kuya Robert led us to another trail which is more precipitous but at the same time more picturesque by a thousand times. This is considered as a viewing deck and the photography spot especially during sunset. This is where we had our favourite silhouette shot courtesy of Kuya Robert.

P.S The rock we were walking was not flat but rather rounded, so caution is required. 

the restless soles

From the viewing deck, the summit is just 5 - 10 minutes away. Before reaching the summit, you will pass by the campsite where you can leave your things first before assaulting the summit. 

We unslung our backpacks on the campsite and jogged to the summit. Assaulting the summit of Mt. Manalmon means you will have to climb atop large, smooth, rounded rocks. Good thing it did not rain during our climb or the trail leading to the summit will be slippery and many times more dangerous since falling off the side will likely result to a fatal drop. 

After a few minutes of knee-shaking assault, we finally reached the summit, and it was worth it! From here, you can see the Madlum River and the distant mountain range. 
Mt. Manalmon Summit
Yes! Summit!
In the opposite direction, feast your eyes with the flatlands of Region 3 and the majesty of Mariang Sinukuan or Mt. Arayat.

Arayat
Uy! Si Arayat!

We stayed on the summit of Mt. Manalmon for about half an hour before we decided to go back to the campsite.

I quickly set up our tent while Pearliloo attended to our dinner. We had the entire mountain for ourselves so we had the privilege of occupying the best spot in the campsite.

After dinner and a little talk, we finally called it a night to prepare for more adventures the next day.

Day 2

Cooking at Mt. manalmon
Cooking Skills Level: 53


We woke up before 6 am the next day to greet the sunrise on the summit. The viewing deck on the summit is oriented away from the east so you cannot actually see the sunrise but it is nice to see the sunlight shining away the darkness from above. 

After loafing on the summit for an hour, we descended on the campsite and prepared our breakfast; hotdog, salted egg and rice.

After eating and a few minute-rest, we quickly descended Mt. Manalmon and to the foot of Mt. Gola. 


Climbing Mt. Gola

The trail going to the summit of Mt. Gola was really, as in, really difficult compared with Mt. Manalmon. At some point, the angle of the trail can be as steep as 65 degrees or more. It was also craggy that going 4x4 (on hands and knees) was painful. 

Mt. Mabio
Mt. Mabio

The assault going to the viewing deck of Mt. Gola is about 20 - 30 minutes, depending to your pacing. It is not an exaggeration to say that climbing Mt. Gola is twice difficult than Mt. Manalmon. 

Mt. Mabio seen from Mt. Gola
With a little photography skills, you can use the sparse vegetation as effects for your phoro
Despite the difficulty, the view above is simply spectacular! The viewing deck is rocky, with little vegetation. So make sure to reach this spot before noon time.  Mt. Mabio, a relatively unknown hiking destination,  is visible from the deck. You can also climb this mountain but you'll have to secure a special permit to do so. And it's a half day's worth of hiking from the location of Mt. Manalmon and Gola.

Mt. Gola
Mt. Gola Marker


According to Kuya Robert, the only thing you can see in the summit of Mt. Gola is the marker since it is covered by vegetation. We decided not to summit Mt. Gola. But if you want, the summit is just under an hour away from the deck.

We were quick on the way down, not because of ease but because we want to get over the difficult terrain fast. (hahaha!)

From the foot of Mt. Gola, you'll have to cross Madlum River once again, and backtrack towards the jump-off point.


What to do After Mt. Manalmon and Mt. Gola

Is this the end of your Bulacan trip?

Of course not! there are lots of other activities that you can do after your hike. 

1. Spelunking at Bayukbok Caves

Bayukbok Caves are a series of underground caves that were used by both Filipino Revolutionaries and guerillas of World War II. Exploring this cave system will take you about an hour. Experience what our forefathers experienced before, look closely to the natural wonders like stalactites, stalagmites, stone pillars and many more. 

Entrance of Bayukbok Cave

2. Cross the Monkey Bridge

If ever you feel a bit ballsy, then make sure to cross the "Infamous" Monkey Bridge of Mt. Manalmon. Probably fifty feet in the air, and a length of more than its height, this is surely for the dudes and gals with serious cajones. Try it! I double dare you!

Monkey Bridge of Mt. Manalmon

3. Swim or wade in the Madlum River

This is a seasonal thing. During the summer season the water is too shallow and has debris since the flow of the river is quite slow.  But during the rainy season, it swells to a dangerous depth. Be guided. 

Things to Remember


1. For the nth time, follow Leave no Trace Principle. There was a time when visitors don't have to go through the mandatory orientation. But due to recklessness and irresponsibility of others, the government has to be more strict. 
2. Do not touch stone formations like stalagmites, stalactites and stone pillars. These speleothem has a distinct shine. But if you touch them, oil from your hands will stick to it so it will no longer be shiny. This effect is irreversible. 
3. Contact the caretaker of the natural reserve beforehand. Use the contact number and email above to  reach them. 
4. Prepare yourself physically, mentally and financially. As always, all mountains are difficult for the unprepared. 


So here we are at the end! I hope you found this guide helpful for your trip. Do you have any questions or anything to say? Let us know in the comment. We would like to hear from you.

Featured Post

A Quiet Place: Sta. Lucia Falls

A Quiet Place: Sta. Lucia Falls A Quiet Place A Quiet Place? Why would I want that? Isn't that scary? No, of course. (Thanks...