Manalmon-Gola: Complete Itinerary and a How to Guide

Manalmon-Gola: Complete Itinerary and a How to Guide

Mt. manalmon and Mt. Gola
Mt. Manalmon (Right) and Mt. Gola (left)
A hiking destination in the heart of Biak na Bato Natural Park, Mt. Manalmon and its twin Mt. Gola is a go-to destination for every adventurers out there. It boasts numerous activities like hiking, swimming, spelunking, and rafting. Mt. Manalmon and Mt. Gola is definitely a must for any thrill seekers out there.

Aside from being a hiking and outdoor destination, it is also a good place to acquaint one's self to history and folklores. Mt. Manalmon is a silent witness to some of the most important events in Philippine History as well as few mystical stories to keep you entertained or creeped out for the entire duration of your hike.

Quickfacts

Height? 196 MASL according to Pinoymountaineer.com
Trail Difficulty? 2/9
Jump-off? Brgy. Bayukbok, San Miguel, Bulacan
Roped Segment? None
Guide? Required. Available at the JOP
Beginner friendly? 100% YES!

The Team

Mt. Manalmon and Mt. Gola are one of the earliest treks of Team Restless Soles. Same as always, there were only two of us in the team. Pearliloo and Iantot. Date of the climb was May 13-14, 2017.

the blogger at Mt. Manalmon
The Restless Soles

How to get there

1. Go to Cubao. Look for Baliuag Bus Lines. It is just across Victory Liner, near the footbridge. 
2. Ride a bus going to Cabanatuan, and tell the driver to drop you off at San Miguel, Bulacan.  Fare is around 150 pesos each. Travel time is 2 - 3 hours, depending on the traffic situation. 
3. Alight at San Miguel, Bulacan. Ride a tricycle at the trike terminal going to Sitio Madlum. Fare is around 200 pesos. Travel time is 30 - 40 minutes. 

Things to Consider before Visiting Mt. Manalmon

Mt. Manalmon and Mt. Gola are both situated within a protected landscape - The Biak na Bato Reserves. The LGU is regulating the number of people entering the protected reserves by requiring an advance reservation for anyone who wants to climb either or both mountains. 

To make your advance reservation, text or call Tata Carling at this number, 09195746470 or send them an email at rrboyflorencio@yahoo.com. To be sure, send a text and an email. 

Tale of the Trail

The excitement starts even before the hike itself. The initial part of the road leading to Sitio Madlum cuts through residential area. But few minutes into the ride, the cemented road ended and we were bouncing up and down as the rugged tricycle navigated the rough road that will take us to our destination. 

You will notice the drastic change of environment as you continue with your travel.  No electrical post and sparsely populated, you'll realize that you already left "civilization" behind. 

There will be one or two "toll gates" (I don't remember, sorry) along the way which you have to pay 20 pesos each. The money collected is used in the local community development fund according to the people we had talked to. 

After 40 minutes of butt-numbing tricycle ride, you will be greeted by a bridge made of wooden beam. 

Crossing the hanging bridge of Mt. Manalmon
Crossing the hanging bridge to Mt. Manalmon

The hike will commence at the wooden bridge. Upon crossing it, you will pass by the house / store of Tata Carling. Your advance reservation will be validated by leafing thru the printed permission letters. 

Good thing about this is that the staff of Biak na Bato will be the one to print your permission letters with information lifted from the email you sent, so make sure to include the necessary info when you contact them. Yey!

A small hitch occurred when Tata Carling cannot find our permission letters from the pile. But instead of sending us back, he decided to let us continue since we came all the way from Cavite. 

We were assigned a guide, Kuya Robert, for our climb. Kuya Robert is a serious but very helpful and awesomely knowledgeable of both the history and folklores surrounding the two mountains. 


Madlum River
Yehey! We're halfway to the summit!
A mandatory orientation was given to us as part of the protocol of the nature reserve. After the briefing, we started our hike. 

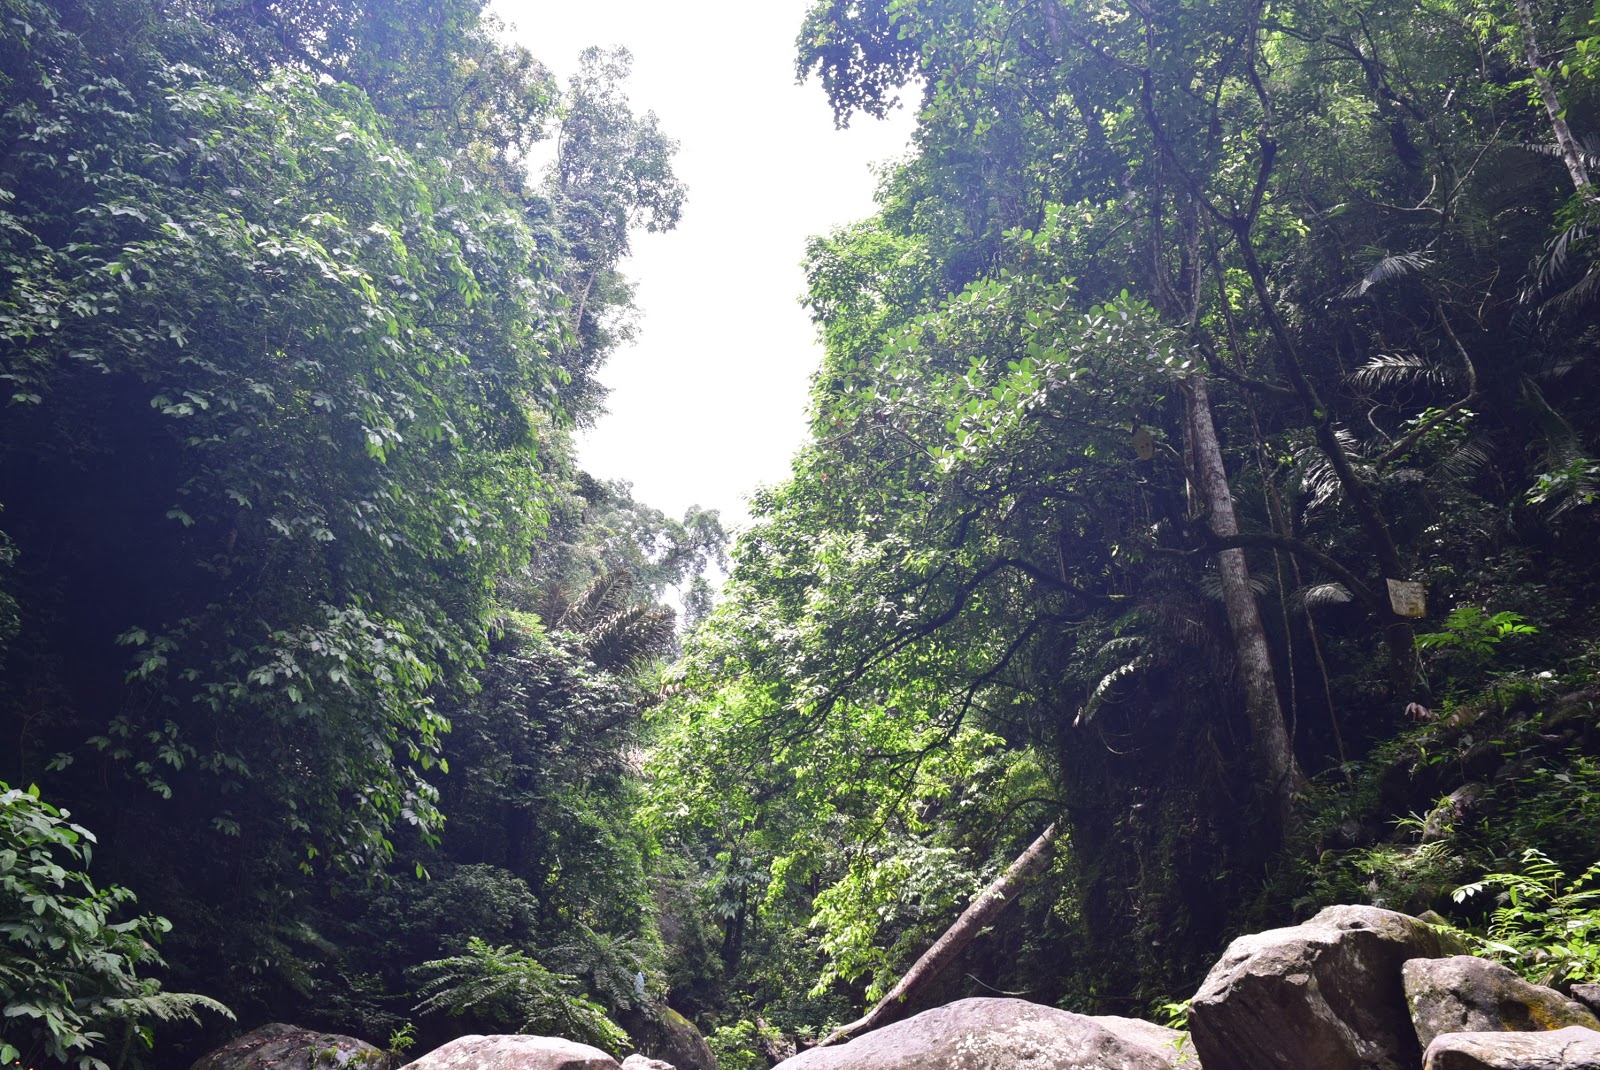
The first part of the trail is a walk through a forest. The trail is shaded so you don't have worry about sunburn. The ground was a bit rocky and sandy, like walking along a river bank. This part of the trail will continue on for about 15 - 20 minutes until you reach the Madlum River. You will cross this river, so make sure you have the proper footwear. 
madlum river
Kuya Robert for Scale!

The water was shallow, with the deepest part of the crossing only reaching our knees. But according to our guide, this river becomes a raging torrent during the rainy season. 

We rested for a few minutes and had a bit Kodakan (photoshoot) with Mt. Manalmon and Mt. Gola at the backdrop. According to the legend, a Filipino supernatural hero named Bernardo Carpio was imprisoned between two large rocks. These rocks were splitted when Bernardo escaped, thus the creation of the two mountains. 

After our extended rest (hahaha!), we continued on to Mt. Manalmon since this mountain is more suitable for camping than Mt. Gola. From the river, you will have to walk for about 10 minutes before you reach the actual foot of Mt. Manalmon. 


Manalmon Marker
Welcome to Mt. Manalmon
There are two trails leading to the summit of Mt. Manalmon - the difficult, and the easy trail. Well you know how it is. Why make life more difficult? So we chose the easy trial. 

From the marker, the angle of the trail becomes steeper with every step. The trail was rocky and solid but shaded nonetheless. 

A little more before the summit, Kuya Robert led us to another trail which is more precipitous but at the same time more picturesque by a thousand times. This is considered as a viewing deck and the photography spot especially during sunset. This is where we had our favourite silhouette shot courtesy of Kuya Robert.

P.S The rock we were walking was not flat but rather rounded, so caution is required. 

the restless soles

From the viewing deck, the summit is just 5 - 10 minutes away. Before reaching the summit, you will pass by the campsite where you can leave your things first before assaulting the summit. 

We unslung our backpacks on the campsite and jogged to the summit. Assaulting the summit of Mt. Manalmon means you will have to climb atop large, smooth, rounded rocks. Good thing it did not rain during our climb or the trail leading to the summit will be slippery and many times more dangerous since falling off the side will likely result to a fatal drop. 

After a few minutes of knee-shaking assault, we finally reached the summit, and it was worth it! From here, you can see the Madlum River and the distant mountain range. 
Mt. Manalmon Summit
Yes! Summit!
In the opposite direction, feast your eyes with the flatlands of Region 3 and the majesty of Mariang Sinukuan or Mt. Arayat.

Arayat
Uy! Si Arayat!

We stayed on the summit of Mt. Manalmon for about half an hour before we decided to go back to the campsite.

I quickly set up our tent while Pearliloo attended to our dinner. We had the entire mountain for ourselves so we had the privilege of occupying the best spot in the campsite.

After dinner and a little talk, we finally called it a night to prepare for more adventures the next day.

Day 2

Cooking at Mt. manalmon
Cooking Skills Level: 53


We woke up before 6 am the next day to greet the sunrise on the summit. The viewing deck on the summit is oriented away from the east so you cannot actually see the sunrise but it is nice to see the sunlight shining away the darkness from above. 

After loafing on the summit for an hour, we descended on the campsite and prepared our breakfast; hotdog, salted egg and rice.

After eating and a few minute-rest, we quickly descended Mt. Manalmon and to the foot of Mt. Gola. 


Climbing Mt. Gola

The trail going to the summit of Mt. Gola was really, as in, really difficult compared with Mt. Manalmon. At some point, the angle of the trail can be as steep as 65 degrees or more. It was also craggy that going 4x4 (on hands and knees) was painful. 

Mt. Mabio
Mt. Mabio

The assault going to the viewing deck of Mt. Gola is about 20 - 30 minutes, depending to your pacing. It is not an exaggeration to say that climbing Mt. Gola is twice difficult than Mt. Manalmon. 

Mt. Mabio seen from Mt. Gola
With a little photography skills, you can use the sparse vegetation as effects for your phoro
Despite the difficulty, the view above is simply spectacular! The viewing deck is rocky, with little vegetation. So make sure to reach this spot before noon time.  Mt. Mabio, a relatively unknown hiking destination,  is visible from the deck. You can also climb this mountain but you'll have to secure a special permit to do so. And it's a half day's worth of hiking from the location of Mt. Manalmon and Gola.

Mt. Gola
Mt. Gola Marker


According to Kuya Robert, the only thing you can see in the summit of Mt. Gola is the marker since it is covered by vegetation. We decided not to summit Mt. Gola. But if you want, the summit is just under an hour away from the deck.

We were quick on the way down, not because of ease but because we want to get over the difficult terrain fast. (hahaha!)

From the foot of Mt. Gola, you'll have to cross Madlum River once again, and backtrack towards the jump-off point.


What to do After Mt. Manalmon and Mt. Gola

Is this the end of your Bulacan trip?

Of course not! there are lots of other activities that you can do after your hike. 

1. Spelunking at Bayukbok Caves

Bayukbok Caves are a series of underground caves that were used by both Filipino Revolutionaries and guerillas of World War II. Exploring this cave system will take you about an hour. Experience what our forefathers experienced before, look closely to the natural wonders like stalactites, stalagmites, stone pillars and many more. 

Entrance of Bayukbok Cave

2. Cross the Monkey Bridge

If ever you feel a bit ballsy, then make sure to cross the "Infamous" Monkey Bridge of Mt. Manalmon. Probably fifty feet in the air, and a length of more than its height, this is surely for the dudes and gals with serious cajones. Try it! I double dare you!

Monkey Bridge of Mt. Manalmon

3. Swim or wade in the Madlum River

This is a seasonal thing. During the summer season the water is too shallow and has debris since the flow of the river is quite slow.  But during the rainy season, it swells to a dangerous depth. Be guided. 

Things to Remember


1. For the nth time, follow Leave no Trace Principle. There was a time when visitors don't have to go through the mandatory orientation. But due to recklessness and irresponsibility of others, the government has to be more strict. 
2. Do not touch stone formations like stalagmites, stalactites and stone pillars. These speleothem has a distinct shine. But if you touch them, oil from your hands will stick to it so it will no longer be shiny. This effect is irreversible. 
3. Contact the caretaker of the natural reserve beforehand. Use the contact number and email above to  reach them. 
4. Prepare yourself physically, mentally and financially. As always, all mountains are difficult for the unprepared. 


So here we are at the end! I hope you found this guide helpful for your trip. Do you have any questions or anything to say? Let us know in the comment. We would like to hear from you.

Mt. Manabu: Travel Guide and Itinerary

Mt. Manabu: Travel Guide and Itinerary

Mt. Manabu
The Cross at the Mt. Manabu Summit
Mt. Manabu is one of the most popular hiking destinations for beginners and experienced climbers alike due to its close proximity to Metro Manila and its relative ease. But do not commit the mistake of missing this mountain whether you're a seasoned climber or not. It has a lot to offer - from a magnificent view of Batangas, forest walk, and of course free civet coffee!

Quickfacts

Height? 760 MASL according to Pinoymountaineer.com
Trail Difficulty? 2/9
Jump-off? Sulok, Brgy. Sta. Cruz
Roped Segment? Yes
Guide? Not required but available at the Brgy. Hall
Beginner friendly? 100% YES!

Manabu is the short term for "MAtaas NA BUndok".

The Team

Climbers at Mt. Manabu
Pearliloo and Ianpot, the restless soles of Mt. Manabu
There are only two of us in the team. The climb date was March 10, 2018.

How to get to Mt. Manabu

1. Ride a bus going to Lipa. Alight either on SM Lipa or Festival Mall junction. 
2. Ride a trike going to Sulok, Brgy. Sta Cruz. Fare is around 60 - 100 pesos one way. 
3. Halfway thru the trike ride, you will have to alight to the barangay hall and register.
4. Registration fee is 20 pesos per pax. Barangay officials will ask you to save their cellphone number in case of emergency. 
5.  Guide services are available for 500 pesos day hike but not required. 

Tale of the Trail

Mt. Manabu
Initial part of the trail
From the barangay hall, the actual jump-off point is still a 10-minute ride away. The main landmark that you are already in the jump-off point is a sari-sari store and a gated parking lot. 

Do not go inside the gated property but rather turn right to the dirt road. There is a water tank there that serves as the First Station. There are eight stations along the trail of Mt. Manabu all together. 

The map of Mt. manabu
The Map of Mt. Manabu
The trail is shaded by trees all through out, so getting sunburned is out of the question. From stations 1 to 4, the trail features gentle slope and some brook crossing. But during our climb, the sky decided to gave us a downpour which made the hike a bit more difficult than expected. 

The trail is rocky so we have to watch our step so we don't slip on the wet stones. 

river crossing manabu
One of the streams you have to cross while climbing Mt. Manabu
There are other groups when we started but when the rain turned into a downpour, a lot of them decided not to continue on since they were not able to waterproof their belongings. Pearly had her poncho with her while I used garbage bag as an expedient raincoat (improvise, adapt and overcome!).

station mt. manabu
Station 2 
We are making good time so we reached Station 2 in under 15 minutes. We stayed there for a few minutes and waited for the rain to peter out but with not much luck. We soldiered on to the next station while I pray that my garbage bag/raincoat holds until the end of our climb. 

Tatay Tino's Residence Manabu
Tatay Tino's Residence
Half-way to the summit, you will pass by the residence of Tatay Tino, the brother of Tatay Pirye, the "Man of Mt. Manabu". Here, you can have your share of unlimited civet coffee that for me, beats the pricey cup of Starbucks and other coño coffee shops in the city. 

We really enjoyed our pit stop at Tatay Tino's residence not only because of the free coffee but also because of the warm welcome we experienced from them. 

Tatay Tino: The Man of Mt. Manabu
We bought a couple of small jars of civet coffee as pasalubong before we left Tatay Tino's. Aside from the coffee, you can also try their home made lumpiang gulay  or vegetable springroll made of sayote. 


Penis sculpture in Mt. Manabu
Naughty naughty!
Civet Coffee for Sale Mt. Manabu
Civet Coffee for Sale!
From Tatay Tino's, the trail diverge into two trails. The left trail leads to the grotto, while the right trail is the traditional trail. You can use both trail to complete the rosary trail of Mt. Manabu, ascending from either of the two then descending on the other. 

But for our case, we are not able to do so since the grotto trail was closed-off due to the bad weather. According to some locals, the grotto trail is steeper than the traditional so more perilous especially in bad weather.

From Station 4 to the small cross, is a whole lot steeper so prepare yourself. But don't worry since fixed ropes are in place to help you on your ascent and descent.

One of the roped segments in Mt. Manabu
It took us 30 minutes to jump this hurdle before we arrive on a small clearing where you can see the small cross. The sun finally peaks shortly after we arrived on the clearing.
Mt. Susong Dalaga as seen from the clearing of Mt. Manabu

From this vantage point, you have a clear view of the Malarayat Mountain Range. We decided to have a breather and just enjoy the view of Batangas and the cold weather that day.

The Small Cross
The Small Cross
From the clearing, the actual summit is just about 5 - 10 minutes away so we decided to continue on to avoid the glaring noon sun.

The Cross at the Summit
The summit is marked by a large cross and a small altar made of stone. The view here is magnificent. From below, you can see the towns and cities of Batangas and the other nearby mountains like Susong Dalaga and Maculot in Cuenca. 

Admiring the scene from the Summit of Mt. Manabu
We loafed around the summit for about 30 minutes before we decided to descend since the sky darkened once more. We back-trailed since the trail leading to the grotto was closed-off due to heavy rains. 

The descent was painfully difficult because of the mud and slippery rocks. Mud caked our boots, making each step laborious and a bit dangerous but fun nonetheless!

We made light of the situation by making fun and taking unguarded pictures of each other on the way down. 

The slippery descent; laughing despite the difficult trail

Despite the difficulty, we were able to finish the descent in just over an hour. We passed by Tatay Tino's residence again which we bade our farewell. We finally reached the jump-off point a few minutes past 1 PM. 

There are facilities present where you can wash up and have a lunch. Use of shower and bathroom are 25 pesos per head. After washing up, we ordered adobo with rice for only 50 pesos per serving. 

Mt. Maculot in the distance, as seen from the summit of Mt. Manabu
We may have endured the cold rain and the slippery trail but it was not enough to dampen our experience of this beautiful mountain. We were happy when we started this climb, but we descended much, much happier. 

But even how happy an experience is, it all have to end. 

So we rode a trike back to the city, and bade our farewell to yet another beautiful mountain that will have a special place in our hearts. 

Things to Remember 

remember

  1. Again, Practice LNT.  I will never get tired of reminding everyone about this. Before your climb, familiarize yourself first about the Leave No Trace Principle. Let's preserve the beauty and the identity of the mountain. 
  2. Respect the religious icons you'll find in the mountains. It is disrespectful to hang on the arms of the cross at the summit, or have a rather wacky pose in front of it. It's not worth the few Facebook or Instagram likes peeps. 
  3. Never underestimate a mountain. Online resources state that Mt. Manabu has a difficulty level of 2/9. However, if you are not prepared physically and mentally, then all mountains are 9/9. 
So here we are at the end of our post. I hope this post can help you in planning your next getaway. We are happy to be part of your travels and adventure. Aja!

Mt. Manabu
Thank you from the Restless Soles!

A Quiet Place: Sta. Lucia Falls

A Quiet Place: Sta. Lucia Falls

Sta. Lucia Falls, a quiet Place
A Quiet Place


A Quiet Place? Why would I want that? Isn't that scary? No, of course. (Thanks to you Hollywood!) 

Spending a day of peace and quiet is such a rare thing. What's more difficult is finding a place where you can remain silent for a long time, not minding your emails, deadlines, bills and other stressors.

With the sudden spike of interest in travelling, it's almost impossible to find a single square inch of peace in supposedly "peaceful settings" like mountains, seashores or even a parks. 

Try to sit and meditate on the summit of mountains near Manila and you'll know what I'm talking about. I'll not be long into your meditation before some 'igers and FB travellers start invading your peace circle. 

Anyway, fret no more! 

We got your back on finding the best to finally unplug. Let me introduce you to Sta. Lucia Falls. 

The Team 

eight members of team palavern
Team Palavern
Team Palavern namely, Memay, Dj Plywood, Denver the Dinosaur, Syrill Mariposa, JayCo and Pearlilooliloo and Ian (photographer). Travel date was July 8, 2018. 

How to get there

Sta. Lucia Falls is located in the town of Dolores in Quezon Province. It is about 80 kilometres south of Metro Manila.
1. Ride a bus going to Lucena, Quezon then alight at San Pablo Medical. If you're coming from Alabang, the fare is 98 pesos each.
2. From San Pablo Medical, ride a trike to the jeepney terminal plying to Dolores, Quezon. 10 pesos each. 
3. From Dolores Jeepney Terminal, ride a monster jeep going to Dolores, Quezon. Fare is 40 - 50 pesos each. Tell the driver to drop you off at Sta. Lucia trail head. 

The Trek

Upon getting off the jeepney, you will be greeted by a quaint talipapa. There, you will find stalls selling various amulets and even water jugs. Water jugs? It is said that the water from the falls has some miraculous healing properties. Locals and visitors alike fetch this miraculous water for different purposes. (Sorry no photos here!) Despite the stores, there are only few people present outside so we were not able to ask permission to snap some photos. 

From the talipapa, just continue walking straight until you see a cemented trail. This trail will cut through a community. This part of the trail last for about 10 - 15 minute walk. At the end of this path, you will find a stair leading down to the water below. 

Stair to Sta. Lucia Falls
The stair leading down is quite steep so be very careful. Compounded by moss, this descent from steep stair is a  recipe for a nasty tumble. 

Steep stairs to Sta. Lucia Falls
Sta. Lucia is a pilgrimage site first and a trekking destination second. Upon your descent, the first thing you will see is a grotto. Here, you can light a candle and offer a prayer for you and your team's safety. 

One of the many grottos in Sta. Lucia Falls
From the top of the stairs, you will take about 20 - 30-minutes before you reach the bottom. Halfway through, you can easily hear the flowing water below. 

Boulders of Sta. Lucia
There are many large boulders along the waters of Sta. Lucia Falls

This place has a very different vibe to it. Upon arriving on the falls, you will find the place almost devoid of human noises. The only thing you can hear is the flowing water, the rustling of leaves and the sound of wind. Going here will not give you an "outing" like experience but rather like going on a nature retreat.

We thought we had the entire place to ourselves until we stumble on several groups of pilgrims.

Religious statues and inscriptions are present along and above the flowing water. We opted not to snap any of it for two reasons. 1. There are people praying on them so we want to be respectful. 2. We just feel inappropriate to do so. This place is more of a sacred place first before a tourist spot.

Stone cairn
Stone Cairn
This is, for me, one of the best place to meditate and reflect. The water was very cool, and refreshing. It was not very deep so instead of swimming, wading is more of a proper term on what you can do here. Aside from water wading, you can just sit on one of the many rocks and enjoy the view and the ambience. If you're the pious kind of person, Sta. Lucia Falls offers a sanctuary for prayers

Things to Remember

remember these

ONCE AGAIN, let me remind you of some things you have to consider if ever you want to visit Sta. Lucia Falls.

1. Practice Leave No Trail Principle. Despite the relative obscurity of Sta. Lucia Falls, it was not saved from the acts of vandals and litterers. Let's help in preserving the beauty of the location.
2. Be EXTRA silent. This is a sanctuary and a holy place.
3. There are no fees to enter the place. But this may change depending on season. E.i Holy Week. So check with the local officials for confirmation.
4. Check for weather forecast. Threats of slipping and possible flash flood can occur in times of heavy downpour.
5. Though named Sta. Lucia Falls, the actual cascade is not seen on the immediate vicinity. We were not able to find the source of the water but we reckon that the actual falls is just a few minutes upstream. Before doing so, please have a guide with you.

I hope you enjoyed our guide. Now, what are you waiting for? Pack your bags now and just go!

Show us some love and please share and subscribe!

Gallery

serenity

gloomy skies

immensity

into the unknown

Team Palavern

Dj Plywood
Memay 

JCO
Sy Boss Manager
Pearlilooliloo
Denver The Last Dinosuar 
Iansky

Featured Post

A Quiet Place: Sta. Lucia Falls

A Quiet Place: Sta. Lucia Falls A Quiet Place A Quiet Place? Why would I want that? Isn't that scary? No, of course. (Thanks...